
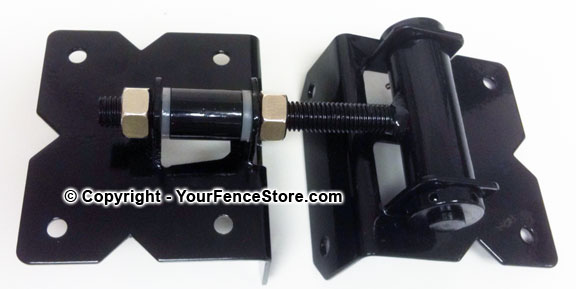
The picture above is the Self-Closing Gate Hinge. The right side of the hinge is spring loaded and is attached to the post. The left side of the gate hinge is attached to the gate. The ideal spacing between the post and the gate is 0.75 to 1.25 inches.
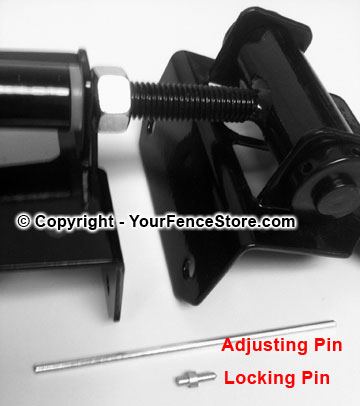
Enclosed in each set of hinges you will have two hinges, pack of screws, one adjusting pin (shown above – approximately 3 inches long), and two locking pins (shown above).
Steps for installation:
- Place horizontal adjustment on gate only
- Screw hinges onto gate – hinge side with the two nuts (best to pre-drill holes for the screws)
- Screw hinges onto post – spring loaded side of the hinge (best to pre-drill holes for the screws)
- Horizontal adjustment – use wrench to adjust nuts for proper horizontal position
- Fully tighten both nuts
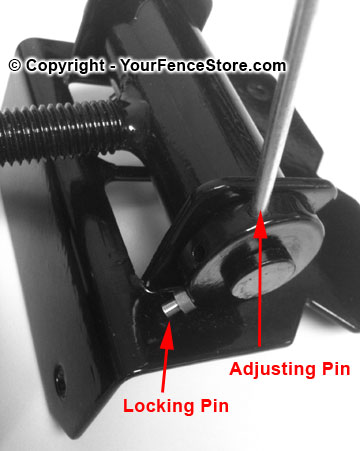
- Insert adjusting pin and rotate towards gate until the desired amount of tension is achieved
- Insert locking pin
- Rotate adjusting pin towards post until the locking pin is against the hinge and remove the adjusting pin
Note: If desired you can take out the locking pin to make the hinges so they are not self-closing.